Skip to content
Installing Feather M17 SSD in Your MacBook
- Backup your MacBook externally, using Time Machine.
- How to Create a Time Machine Backup
- Turn your computer off and unplug the power cord.
- Clear a smooth, clean surface to lay your computer upside down.
- Using your red P1.2 screwdriver included in your order, unscrew the six screws from the back panel of your computer, being careful to note which screws belong in which holes.
- Place the suction cup included in your order on the middle back of the computer and gently (but with approximately 4lbs of force) pull straight up on the suction cup to pop and release the middle two clips underneath the panel. You will be able to hear this if successful.
- Move the suction cup to one corner on the side of the back panel closest to the trackpad. Gently pull up on the suction cup and place your wedge underneath the back panel and then push it toward the hinge end of the computer along the edge of the machine. (Note: This process may take more force than expected. Repeat on the other corner and side.)
- Using your fingertips, gently push the hinge-edge of your back panel on both sides. Once loosened, slide the back cover up and towards you. (Note: This process might take more force than expected.)
- Peel the black tape off the original SSD.
- Using the blue T5 screwdriver, unmount the two black screws on either side of the original SSD.
- Place the wedge on its side at the base of the original SSD, then slide the SSD towards you and use the wedge to pry up the original SSD.
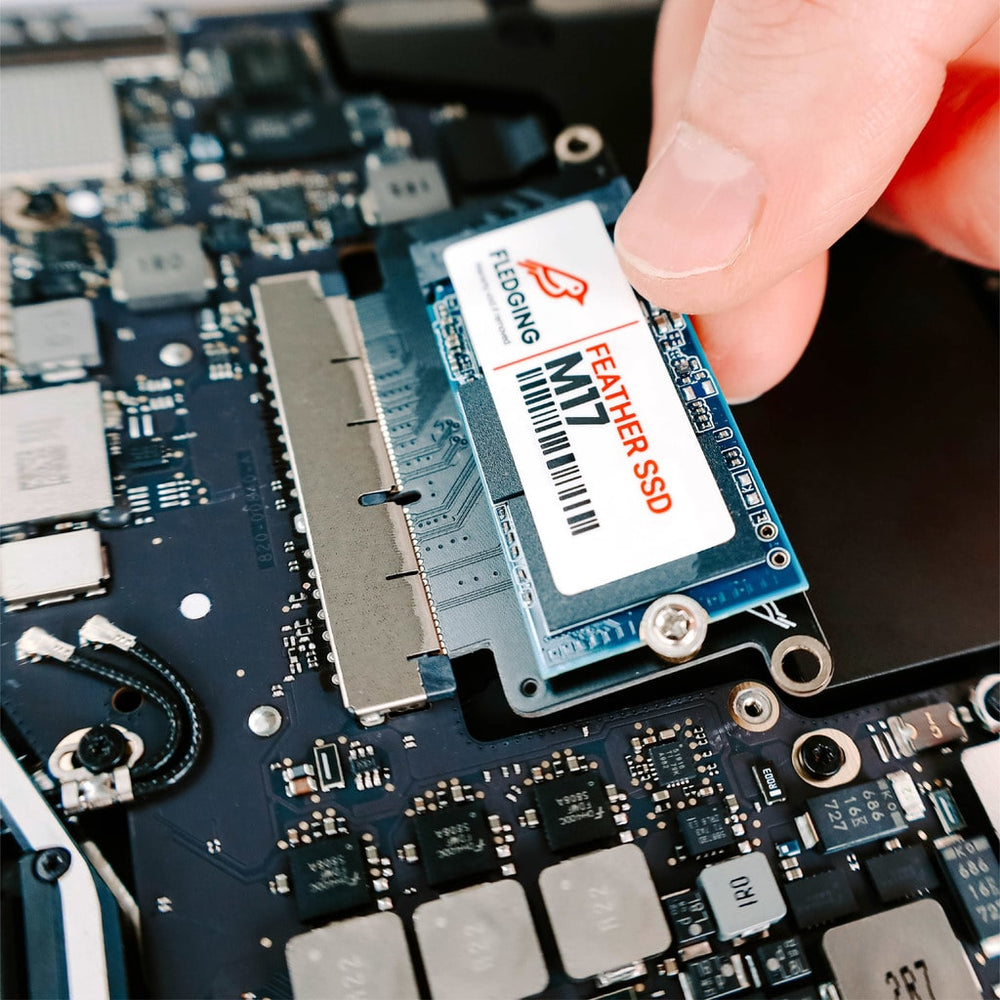
- Slide the Feather M17 in the socket and ensure it is inserted all the way.
- Put back the two black screws on either side of the SSD.
- Replace the black tape.
- Place the panel back onto the bottom of the computer at an angle, focusing on the hinge end of the computer, aligning all hinge edges.
- Gently slide the back cover toward the trackpad side of the computer, about ½ inch from the hinge.
- Let the panel rest on the computer and slide it toward the hinge, catching hooks underneath on the middle, right, and left sides, fitting into place. Everything should be perfectly aligned at this point and almost appear as finished.
- Press down in the middle of the back cover, then on both the right and left sides, hearing all four clips pop back into place, securing the back panel to the computer.
- Return the back panel screws making sure to return each to its original location.
- Power on your computer and let it turn on normally.
- If your backup was originally running High Sierra:
- Plug in your external backup and restore your data using Migration Assistant.
- If your backup was originally running on Mojave or a newer macOS:
- Upgrade your computer to the macOS to match your backup and then plug in your external backup and restore your data using Migration Assistant.