Checking Your Firmware
Always check for firmware updates for your SSD! Manufacturers push updates all the time.
Samsung SSD users, please make sure you update your firmware before using it in Thunder using this link. Otherwise your SSD will not be recognized by your operating system.
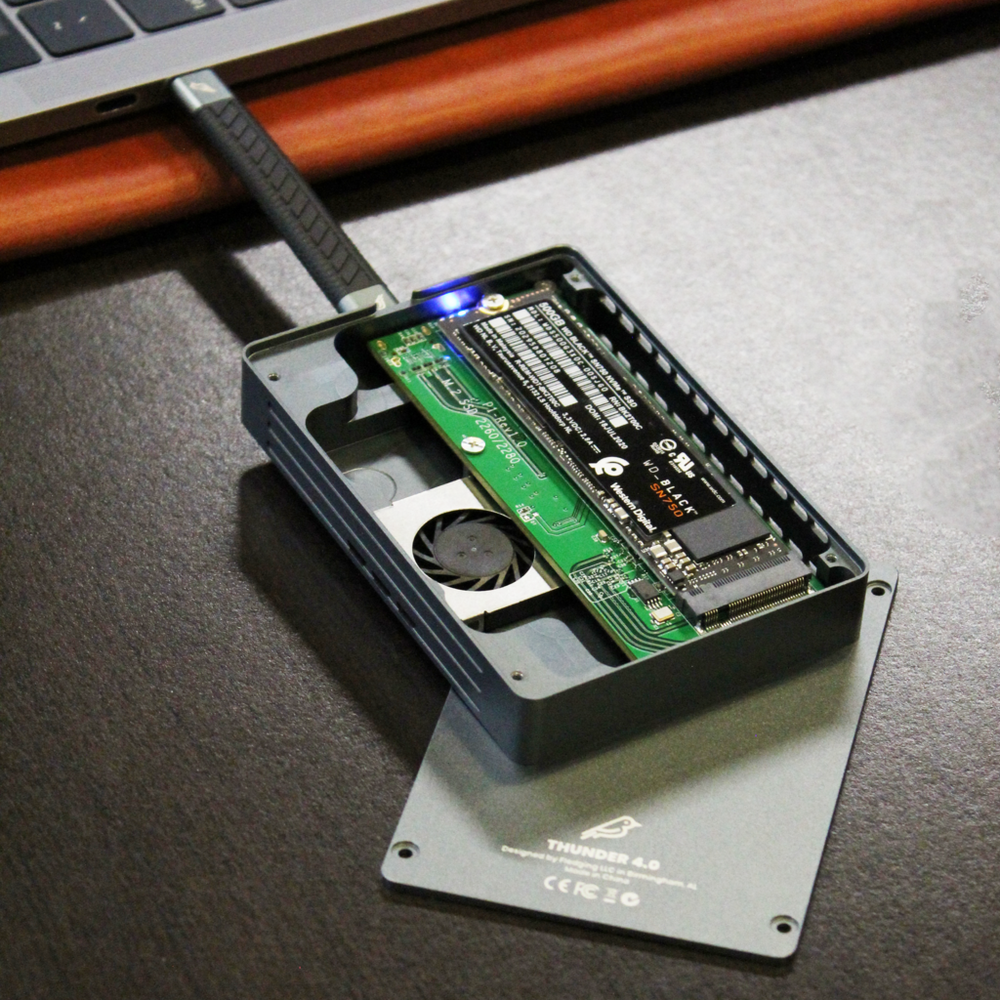
How to Install Your SSD
- Use a Phillips Head screwdriver to remove the four screws on the lid.
- Insert your SSD into the M.2 slot.
- Use the included mounting screw to secure your SSD.
- Replace the lid and replace the four screws.
- Plug your Shell Thunder into your machine.
- Install the Thermal Pad (see instructions below).
- Find the formatting instructions for your machine.
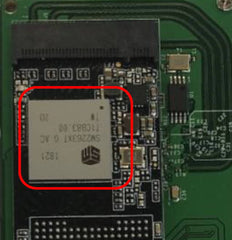
Why Do I Need the Thermal Pad?
The thermal pad reduces your SSD's operating temperature by at least 15°C, depending on the SSD you use, and increases your SSD's life-span.
See the following for how to apply the thermal pad:
- Peel one side of plastic cover.
- Carefully apply the pad’s sticky side covering SSD’s controller chip, see pictures below.
- Peel off the remaining plastic cover.
- Follow the rest of Thunder Installation Guide.
Note: The controller is the "brain" of an SSD and it's the hottest place; therefore, it needs cooling. Each SSD looks different, but the controller is always the big chip near the connection pins
Note: If you re-open the Thunder’s cover after thermal pad is applied, the cover may appear to be sticky from the bottom, please use caution. The thermal pad may also stick itself to the cover after you re-open it, this is totally okay. Thermal pad works as long as it has contact between the hottest place on the SSD (Controller) and the cover.