Pros & Cons of Enabling Cache
Pros: Uses faster system memory to temporarily queue write commands until Shell Thunder is ready to commit them to disk. This improves performance as the application doesn't need to wait for the drive to continue operating.
Cons: In the event of system failure, power outage, or accidental removal, data loss or corruption may occur. Be sure to always safely eject before disconnecting Shell Thunder if cache is enabled.
How to Enable Cache
- Locate Shell Thunder in This PC, right click it, and then click Properties.
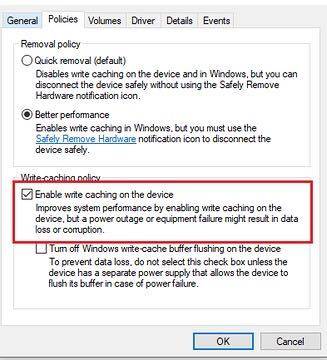
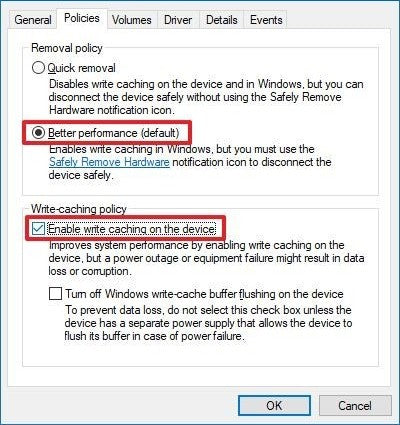
- Click the Policies tab.
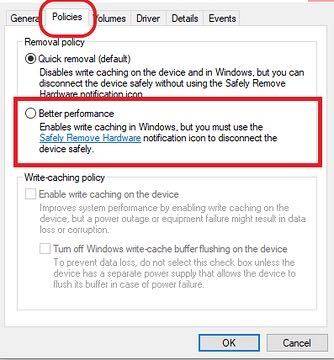
- Under the Removal policy, select "Better performance.
- Under Write-caching policy, click "Enable write caching on the device."